Showing posts with label TUTORIAL. Show all posts

How to make foiled stickers with digital stamps


Today I experimented with using digital stamps and some foil to create foiled stickers with my Silhouette! SPOILER ALERT: It took a few tries but I got there eventually!

I used a bunch of Kellie Stamps digital stamps including the new PANDEMIC and IN THE NEWS sets

Here is how I got there in the end ...

You can watch this video on YouTube or subscribe to my YouTube channel here.

How to create a mini kit using digital printables :: Week 3 Project Life


I am a huge fan of digital printables, I love being able to get the latest kits – without paying usually double for shipping!


The printables I bought were:


Once I had my printables all printed out, I put together a little mini kit to work with to create this week's spread. I love mixing digital and real-life to create a hybrid approach.


Here is my process for putting together my little mini kit and how I used that kit to create this week's layout... 
You can watch this video on YouTube or subscribe to my YouTube channel here.

How to make TN inserts with scrap paper (or gorgeous Pocket Letters from friends!)


Basically, as soon as I saw the amazing Pocket Letter that Michelle sent me, I knew I would have to pull it all apart (with her kind permission of course!) and create some inserts for the equally gorgeous TN cover she made me!


You don't need a pocket letter to use this technique however, you can use any of your favourite leftover scrap papers, or even journal cards from PL kits.


Here is how I created my inserts from Michelle's letter... 
You can watch this video on YouTube or subscribe to my YouTube channel here.

How to use digital stamps to create your own journal cards for December Daily


Today I'm showing you a few ways to use your digital stamps (in this case, the latest release from Kellie Stamps) to create your own cards for December Daily.

The beauty of this is that they can be completely customised to suit your colours, photos and style.


Here are just a few ideas that you could use... 
You can watch this video on YouTube or subscribe to my YouTube channel here.

If you want to learn more about digital stamps, don't forget to check out my Digital Stamp Documenting class over at Big Picture Classes too.

How to make your own kits from your stash

So. I totally took all your suggestions to create my own kits from my stash for the next time I don't have a new kit to work with. And I LOVE the results!

Each kit has a selection of 4x6 cards, 3x4 cards, alphas, embellishments and washi tape.


Pink? Of course it features heavily!


I also picked out quite a few of my favourites so they are likely to get used up quick smart rather than staying hidden in my stash.


And for something a bit different, a fully Black, White and Gold kit.


I'm sure I'll get 2-3 spreads from each kit so I can't wait to start using them!

Here is the process I went through to put these kits together... 
You can watch this video on YouTube or subscribe to my YouTube channel here.

How to print and cut digital elements using Photoshop and a Silhouette

I've been just loving all the digital downloads from the AC Digitals store this week, so I thought I'd put together a quick tutorial and show you how I use Photoshop and my Silhouette to cut them all out quickly and easily!


You can watch this video on YouTube or subscribe to my YouTube channel here.

How to make your own Traveler's Notebook inserts

I love making my own inserts for my Traveler's Notebooks and it is SO EASY. You can use whatever colour or weight papers you like and even use up your scraps to make the covers.

Here is a quick tutorial on how I use faux staples to make my own Traveler's Notebook inserts... 
You can watch this video on YouTube or subscribe to my YouTube channel here.

Traveler's Notebook Layout :: Planner Addict


Of course I had to document the arrival of my new planner in another planner! I used bits of the packaging on the right-hand side of the spread but the left-hand side had quite a lot of bleed-through from the previous spread. I needed to cover it up but none of the tags I had on hand were big enough. So I made my own on my Silhouette!

Below is the cut file I used, so if you want some giant tags for yourself simply right-click the image and save to your computer. Once you trace the shapes in your Silhouette software, you'll be able to cut as many as you want! If you don't have a Silhouette, you could still print it out and use it as a template to hand cut the tags.

Do let me know if you use them, I totally want to see!

How to create Project Life cards on your Phone


This week I've got a wee sneaky peek of the June releases from Kellie Stamps (available on the 15th). I also show you how you can use your phone to create these filler cards using digital stamps and LetterGlow app. This is perfect if you don't have Photoshop or if you just don't want to get up off the couch! I also added some digital stamps from the OBSESSED set directly to my photos. Once I had these cards created and photos printed, the whole spread took less than 8 minutes to put together! Not too shabby.


This is also a small look at the planner clear stamps that will be available for pre-order. Even if you aren't a planner girl, these stamps are still perfect for Project Life. I made my own filler card with a few of them stacked together and a pink pen. Too easy.


Here is the process video of how this layout came together and the tutorial for creating filler cards with your phone... 

How to print large photo inserts at home


I am OBSESSED with large photo inserts for my Project Life album this year. And once you get the hang of it, printing the photos at home is super easy. I use Photoshop to resize, crop and print each segment of the photo on 4x6 photo paper and them trim them to fit. You'd never know it wasn't a full size photo to begin with!


Here is a quick video tutorial of how I do it ... 
You can watch this video on YouTube or subscribe to my YouTube channel here.

Project Life :: Week 35


It has to be said that I am fairly new to using digital products in my Project Life album but so far I am loving just how versatile they can be. I'm a graphic designer by trade so I'm not intimidated by using digital products but these techniques are so simple, even beginners will love them. A basic knowledge of Photoshop is handy but definitely not essential. All the stamps I've used this week are from Kellie Stamps.


In this weeks spread I used a variety of digital techniques and put together a little video so you can see how I've been working with these products. Repeating patterns, journalling cards, direct to photos via my phone and using my Silhouette are just a few ways. I've also used them to create stitching patterns and cards for foiling.


Here is the process video of how this layout came together...
You can watch this video on YouTube or subscribe to my YouTube channel here.

Planner Love :: DIY Dividers


Someone asked me how I made the dividers for my planner. There are a couple of ways that I created my dividers. When I first got my planner I dove straight in and glued my existing dividers to some patterned paper, cut around the edge, punched some holes and started decorating.


I've used all sorts of things to decorate them, rub-ons, stickers, old postcards, washi tape. The possibilities are endless. And I get to use up my abundance of small letter stickers for the titles! Mostly I just wanted to have fun and if I change my mind or don't like the result, I'll simply make new ones. In fact, I'm pretty sure these are going to be changing often.


But once I decided to make dividers to divide the divisions (!), I had to find another way. I could have just traced the existing dividers onto some more paper or cardstock and then cut them out, but since I'll probably be making a few of these, I created my own cut file for my Silhouette. Then I can cut out as many dividers as I need! I've included the cut file below for those of you with a Silhouette.

A5 Planner Diver Cut file

Project Life Tips :: Creating my own patterned cards

One way to stretch the embellishments and stamps you have is to create your own cards with them. I love repeating stamps to create my own patterned cards (see how simple it is below).


Another easy way is to use your stash of washi tapes and cover a plain card with one (or more) of them.


Project Life Tips :: Altering cards you don't love

As a subscriber to a monthly Project Life kit, there are generally a few cards each month that don't suit my style, or the season I'm in. Some I give away but others I try to alter to suit.


The easiest way to alter cards is to cover up the parts that you don't like. Sometimes I stitch down another smaller scrap of patterned paper, or use a diecut/sticker to hide things.


Project Life Tips :: Typing on journalling cards

I'm sure I'm not the only one who isn't enamored with their own handwriting. One of the other ways I get my stories down is by using a typewriter. Some journalling cards are a bit hard to put through a typewriter so I found the easiest way is to fix them to a sheet of regular paper, with either tape-runner on the back or a little washi tape at the top and bottom. I usually place my photo where I want it and make a light mark with a pencil for where I want my journalling to start.


Once I've finished typing I pull off the tape and erase the pencil make, attach my photo and its all done. This same technique works well for typing on stickers or labels as well.


DIY Journalling Cards

Ready-made journalling cards and kit subscriptions are great, but some times it's nice to create something a little more custom, something that completely suits your colour scheme or style. Here are three easy ways to create your own DIY Journalling cards with supplies you probably already have on hand.

1. Sequins (and some fake letterpress!)
 
I always have a stash of sequins on hand to jazz up my journalling cards, either glueing them down or threading them onto string and wrapping them around several times. I used an embossing die and my die-cutting machine to add a little texture.
Bonus: I stacked and glued chipboard circles together, inked it with some pigment ink and ran them through my die-cutting machine to create a letterpress-style circle to my watercolour paper before stamping the sentiment right on top. 

2. Washi Tape
Create ombre banners, layer different patterns to create titles, cover the entire card. Washi tape isn't just great as an embellishment to your journalling cards but can be used to create great bases as well.

3. Stamps and diecuts
You probably already have a stash of stamps, so it's time to pull them out and use them to create title blocks, backgrounds and frames for your photos. Here I cut out the stamp and used washi tape to stick it down. Now I have the perfect frame for one of my Instagram photos.

I hope this inspires you to create your own mini masterpieces!

Beaded Ombre Necklace


I was picking up some beads to make my wedding jewellery and I saw these beautiful blue ones. I couldn't resist and I bought them home to make a necklace. Here's how I did it...

  1. Gather your beads and preferred beading medium. I used nylon string but you can use what ever you prefer. You'll need beads in at least three shades of one colour.
  2. Start by tying a knot a little bit back from one end of your thread.
  3. Thread on half of your lightest coloured beads.
  4. Then thread on half of your medium coloured beads.
  5. Add on all of your darkest coloured beads and then thread the remaining medium coloured and light coloured beads.
  6. Tie both ends of your string tightly together and you have yourself a pretty ombre necklace!
 Wear it and enjoy!

The World's Simplest Washi Tape Holder DIY

Its almost embarrasing calling this a tutorial as it is so simple to put together. There are only 3 things you need and it might take a total of 5 mins.

Materials:
  • 1–2 wooden dowels cut to length
  • A saucer
  • Hot glue gun

Using a very large blob (technical term) of hot glue, stand your dowel up, perpendicular to the saucer. You can use one dowel in the middle of the saucer or use two like I have here. The length of your dowels will depend on how much washi you have (or are planning to have!) but mine were approximately 30cm (12 inches) high.

I love being able to see my whole collection at once and hopefully it will mean I can avoid buying multiples of the same design (again).

I have mine sitting on my desk which I also fancied up with a little bit of washi edging...


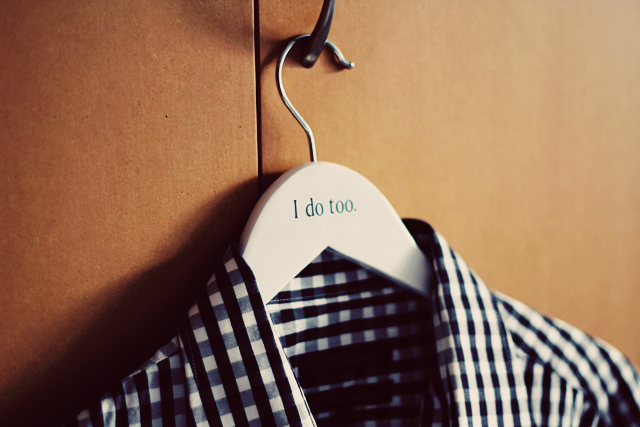
DIY Wedding Dress Hanger

Since buying my wedding dress, it has been sitting in it's bag waiting to be hung up. I wanted something a little bit special to hang it on. I found plenty of options but decided I could probably make something myself.

Here's how I did it...
1. Remove the bottom rod. I just pulled it off and then removed the small nails with some pliers.
2. Measure the length you'll need and draw out a template of what you want it to say. I chose "i do" with some little hearts. But you can choose anything you want (make sure it will fit in the space though).

3. Practise any tricky bits with a scrap piece of wire first. I discovered this after ruining my first attempt! If you have two shapes that are the same (ie. the two hearts), measure and mark the wire so they end up roughly the same size.
4. When you feel confident, start bending and shaping your wire using your template for guidance. Allow extra wire at each end. I used my hands for bending and a pair of pliers to make sharp bends and crimp bits together. Try uing something solid to wrap the wire around helps to create the circular shapes.

5. Once you are all done bending the wire, decide where you want it to sit (bearing in mind the neckline on your dress) and drill two holes. Measure and cut the wire to fit, allowing extra to go into the holes.
6. Glue the wire into place and allow to dry.

The finished product ...

I also made something a little less girly for Shane using this tutorial.